Thursday 9 December 2010

Mini Tutorial

This tutorial shows you how to create a Revolve Profile in Pro-Desktop.
First you open Pro-Desktop and click on the drawing icon, which is on the top left hand corner and select design.

A new design window should appear with a deign palette and tools on the right hand side of the page.

You maximise the design window, and press Shift-W on your keyboard, so that you have a direct view on the base workplane.

Next you click on the straight line icon, that is in the design toolbar and draw a straight line of 170mm long from the middle of the workplane.
Once that is done, you then click on the spline drawing tool from the design toolbar and draw a profile to the right hand side of the line to form an outline of a vase.

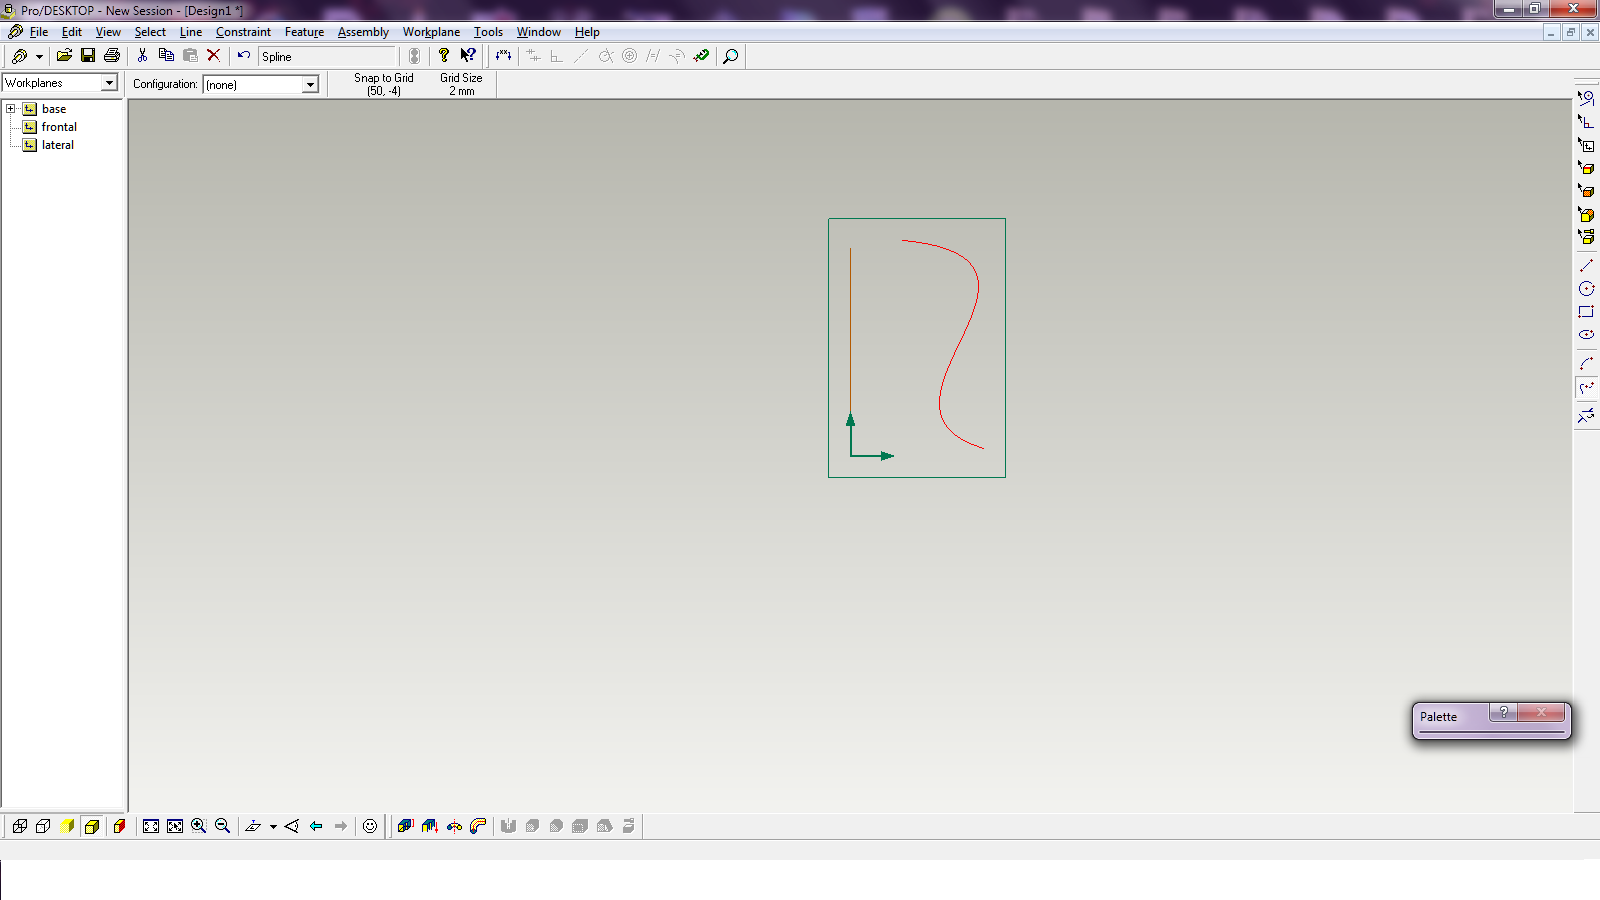
Select the vertical line and right click it and select the 'Toggle Construction' to turn the line into a construction line. This is the axis for the revolve profile.

Now select the 'Revolve Profile' icon which is on the bottom tool bar. When you clicked on it, your drawing should produce a shape of a vase. When it has on the revolve profile box select 'Thin' and specify a thickness of 2mm and an outline of your vase should appear.

Finally you click 'OK' and a revolve profile of a vase should appear.

 This tutorial would be shown to Key Stage 3 students, who are being introduced to Pro-Desktop, as it is a simple task that doesn't use too many drawing tools for beginners to get confused about. This tutorial would be a perfect starter activity for students to carry out.

CAD in Schools

CAD is essential in schools, as it allows students to use different methods to design products and graphics. Most schools are becoming more open to use CAD in their lessons. This is effective, as it will broaden skills and knowledge and make students feel comfortable to use this type of technology in today’s modern society.
The programme of study in Design and Technology states that all pupils should;
Evaluate which hand and machine tools, equipment and computer-aided design/manufacture (CAD/CAM) facilities are the most appropriate to solve technical problems.  This is reinforced into schools by the help of the CAD/CAM in schools programme.  

Here are the overall aims of the CAD/CAM in schools programme: [which is taken from:
  • To ensure all secondary schools in the UK have access to CAD/CAM
  • In English schools, the scheme seeks to provide support for the teaching of CAD/CAM at Key Stage 3 and beyond
  • To use software provided by PTC, Delcam and Speed Step to enhance and develop the use of CAD/CAM in the design and technology curriculum
  • To ensure all teachers using the software with students are adequately trained in both the use of the software and the appropriate curriculum applications
  • To ensure all students can make maximum use of the software, including at home
  • To provide an effective scheme which is well communicated to all parties
  • To develop industrial links with companies which will provide realistic contacts for schools.


http://www.cadinschools.org/page.php?m=33]

Wednesday 8 December 2010

Future Personal Developments Using CAD

Below is a Skills audit on CAD: Outlining how confidant I am with Computer Aided Design.
Now that I have completed my skills audit, I can see what my weaknesses and strengths are and where I need to focus on improving my CAD skills.

From looking at the skills audit, I’m fairly confidant in using Pro-desktop and 2D design, due to the fact that I have been using it for the past year for my assignments and I would feel alright to teach it. However I would need to practice on assembling in Pro-desktop, so that I have knowledge on how to do it.  I would also need to practice with Photoshop, so that I’m confidant and know how to use it well.

SolidWorks, Adobe Illustrator and Pro-Engineer are the main CAD programs that I’m not confidant in using. However I can work on these by researching about them and doing tutorials so that I can get to grips with these CAD programs.

Finally I have just recently started to use Google Sketch up, which is a free package that I have downloaded. It is very simple to use and you can create infinitive models and designs. I would definitely use this in the future and it is a good CAD program to introduce students to.

Google Sketch-Up

Google Sketch-up is a 3D modelling program designed for architectural, civil, and mechanical engineers. It is designed to be easier to use than other 3D CAD programs. Also on Google Sketch up you can upload your models that you make and search and use models made by others.
I  had a go and tried to sketch a room.  

This image shows one of the models that I downloaded.

On the left is the 3D model of a Bin liner and Plastic bag storage, that I did for module task 1.  

Pro - Desktop

Pro-Desktop is a feature-based solid modeller software with kinematic motion and high-quality photo-realistic rendering.


This is a 3D model of a  Zaha Hadid inspired vase, which was done in Pro-Desktop last year for a project. The 3D model had been extruded and the edges have been rounded.  


This shows how to cenvert your drwaing in Pro-Desktop into an Engineering drawing.

This image shows the engineering drawing of the vase.
Below are other models that have been made in Pro-Desktop:


You can Render 3D models on Pro-Desktop and add colour and materials to the models, to improve the 
appearance of it in the album section.
Images below show one of my models that I made for product design 2 module task 1.


Before the Iamge was Rendered

You can see that a background was added and the colour of the model has changed.


Monday 6 December 2010

Computer Generated Illustrations


This is a perfume advert that I did last year for a perfume project. It was done on photoshop, where the background has been changed and text and an image of a perfume bottle has been placed. Below is the original photo, before it was photoshop-ed.


Photoshop is a popular CAD program to create Computer Generated Illustrations such as, adverts, packaging and posters. Photoshop is good for presenting graphical creations.

2D Design

2D design is used to create engineering drawings, packaging for products you can also use it to create 2D drawings that can be manufactured on the Laser cutter and the CNC milling/ engraving machine.

 
This is image has a file imported into 2D design, so that graphics and images can be added to the packaging.


This is simple net that was drawn in 2D design for packaging.


I also used 2D design to create my pattern for a novelty calulator, this was then manufactured on a Laser cutter machine.


2D design was used, to create a pattern for pewter casting, which was then manufactured on a CNC millling machine.